3. User Management
AutoStub has three pre-defined user roles: Super Admin, Admin and User. The landing page of each AutoStub user will vary based on the user role logged in. Based on the user’s role some features of AutoStub may be restricted/granted to the user.
Super Admin
Super Admin is the super user who has access to many administrative tasks of AutoStub. The Super Admin’s credentials are pre-defined. The primary task of the Super Admin is to create accounts and admins. Super Admin can create multiple accounts and assign an Admin to each account. They can view the list of the accounts created by them, and also modify the account details. Accounts created by Super Admin can also be deleted by them. For a Super Admin, all application capabilities are provided by default.
Note
The Super Admin cannot create mocks, only admins and users can.
As a Super Admin, you will see the Super Admin Dashboard displayed upon successful authentication.
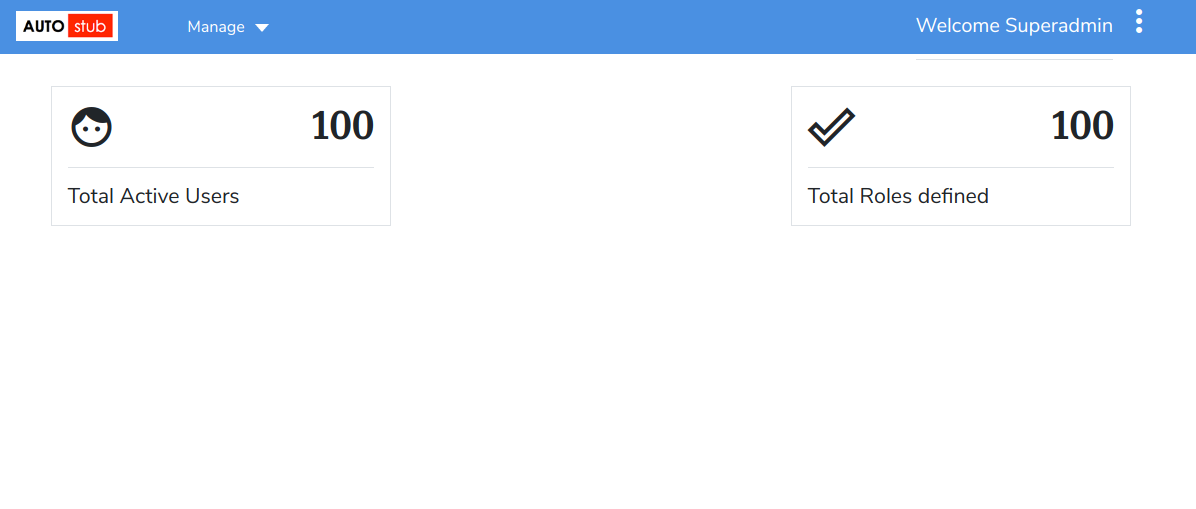
Fig. 3.1 Super Admin Dashboard
Admin
Super Admin creates Admins, and then assigns them to accounts. By default, all application capabilities are assigned to Admins.
An Admin can:
- Create/delete users.
- Create other Admins.
- Create/modify/delete roles.
- Assign roles to users.
- Create/modify/delete groups.
- Assign users to groups.
- Create mocks.
- Assign application capabilities to users.
- Assign application capabilities to a role.
- View/update/remove application capabilities assigned to users.
As an Admin, when you sign in to AutoStub application, your Dashboard will be displayed as shown below.
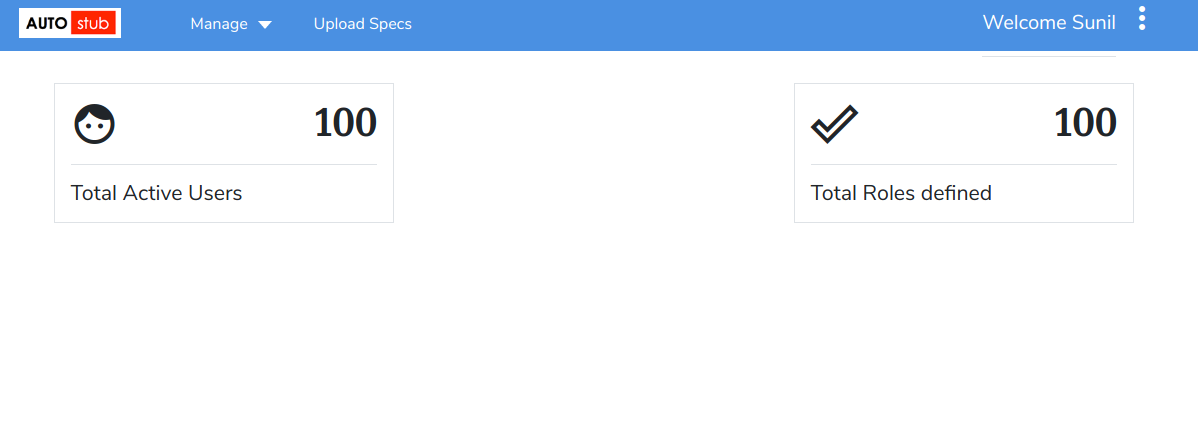
Fig. 3.2 Admin Dashboard
An Admin is basically a User who also has Admin rights apart from creating mocks. Hence an Admin can log into AutoStub as both Admin and User. Based on the privileges assigned to the User, they can view different features available on the dashboard.
User
Users are created by Admins. Admins can assign roles, groups and specific application capabilities to Users. User behavior is a result of the application roles assigned to him. A user can behave as an admin if he has been assigned such application capabilities.
As a User, when you sign in to AutoStub application, you will see the dashboard as shown below.
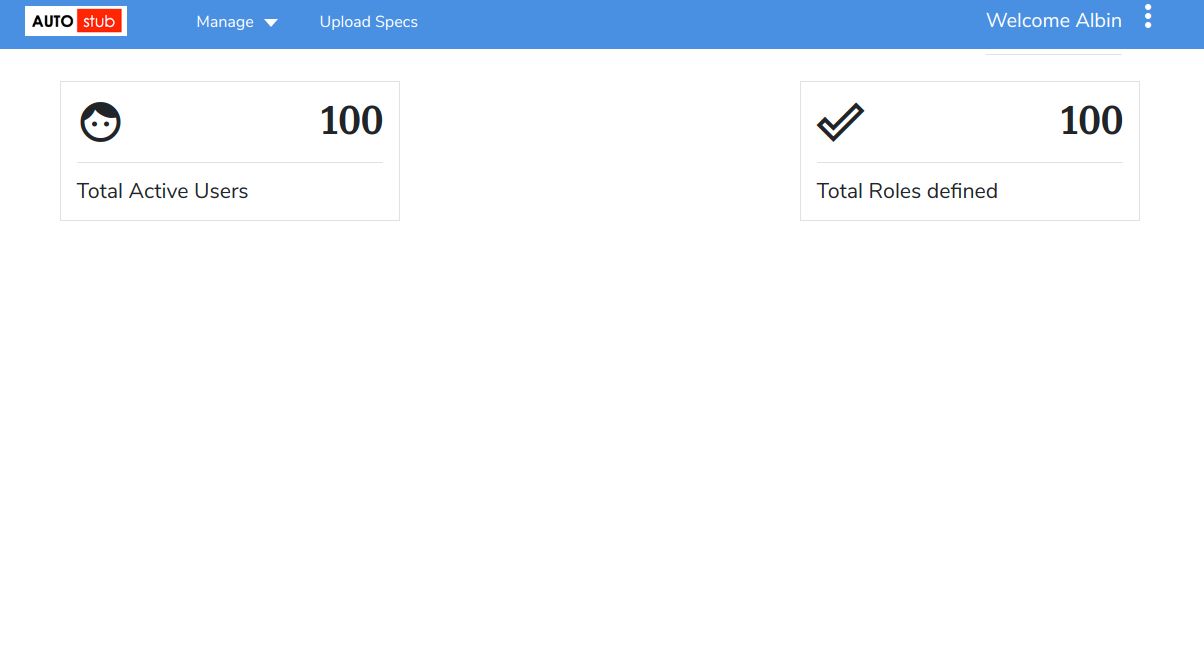
Fig. 3.3 User Dashboard
Note
A User can also be assigned Admin privileges. In such cases, that User can log into AutoStub as both Admin and User. When that User logs in as Admin, they will see the Admin Dashboard. If they log in as User, the User Dashboard will be displayed to them.
3.1. Accounts
3.1.1. Create an account
At the top-left corner of the Dashboard, click Manage and then click Accounts to open the Accounts page.
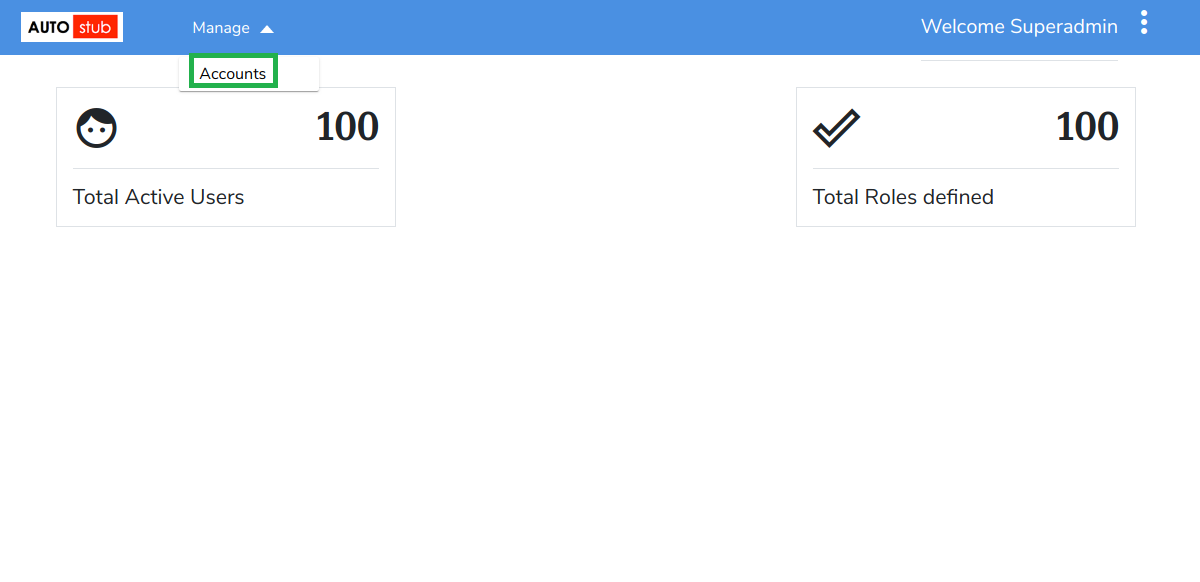
Fig. 3.4 Manage Accounts
On the Accounts page, click Create New Accounts to open the Create Account page.
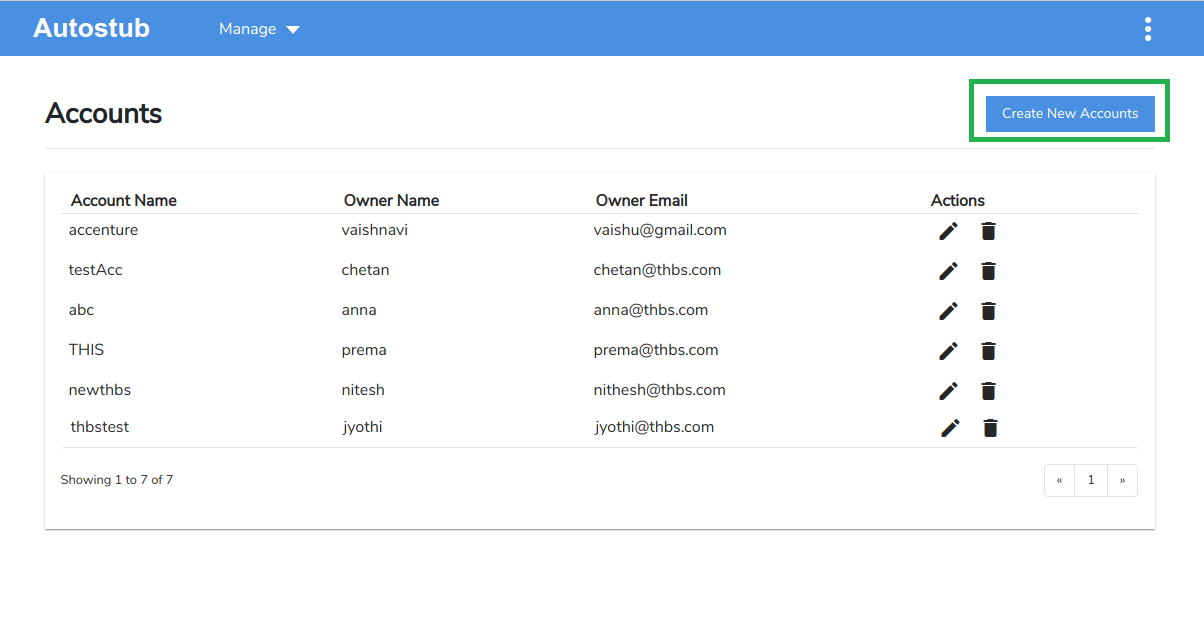
Fig. 3.5 Create New Accounts
On the Create Account page, under the Enter Account Details tab, enter mandatory details such as:
- Account Name
- Account Owner – User Name and Email ID
Click Create.
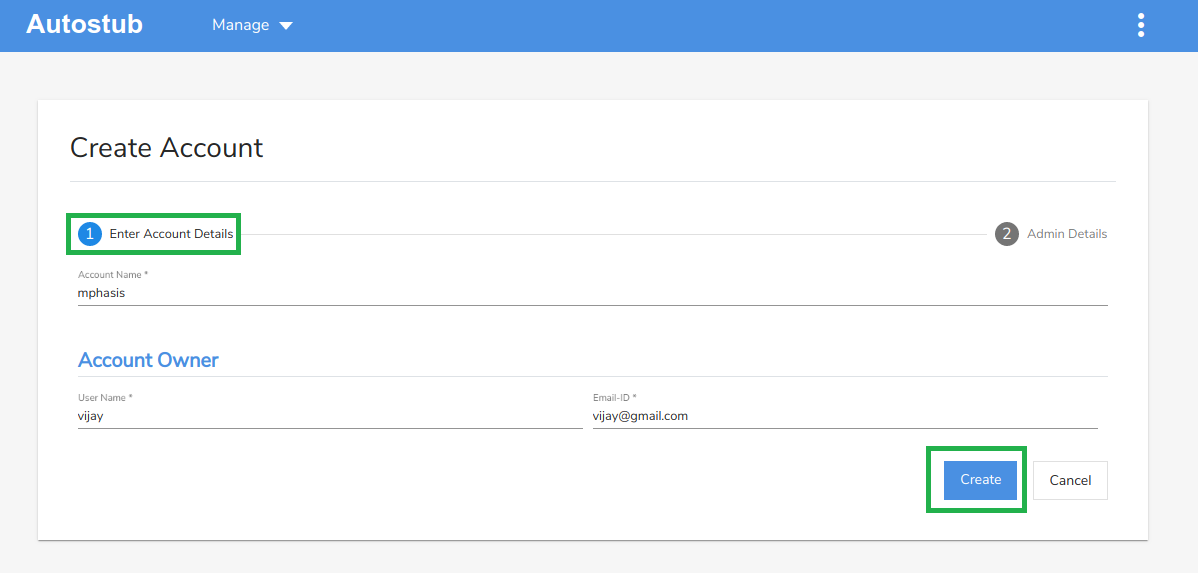
Fig. 3.6 Create Account – Enter Account Details
The account is created and you are navigated to the Admin Details tab. Once you create an account, you need to assign an Admin to the account. You can either choose to add admin details now or later. The newly created account is added to the list of accounts on the Accounts page.
Under the Admin Details tab, enter the mandatory details, such as:
- First Name
- Last Name
- User Name
- Email ID
Click Create to complete the account creation process. Click Skip and Proceed to go to Accounts page without adding admin details.
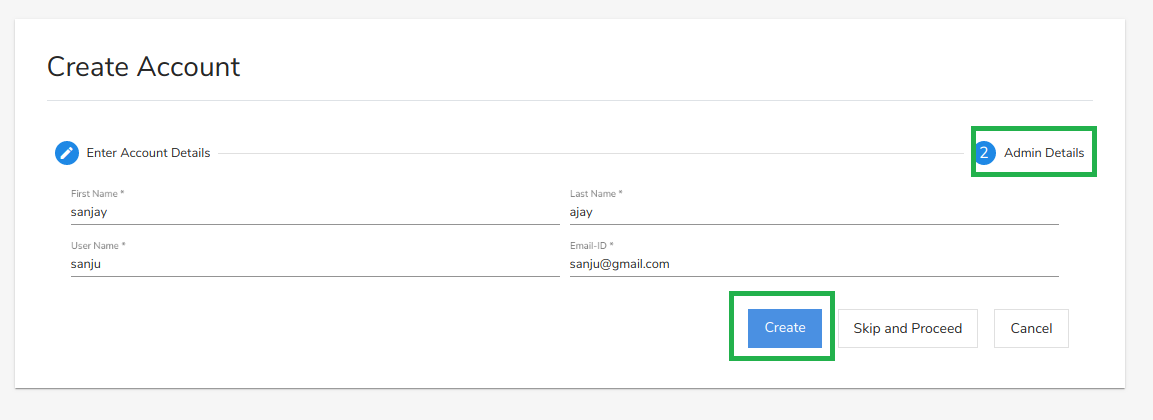
Fig. 3.7 Create Account - Admin details
The Accounts page displays details such as Account Name, Owner Name, Owner Email and Actions for each account. As a Super Admin, you can edit or delete the accounts created by you using the edit
 or delete
  icons respectively.
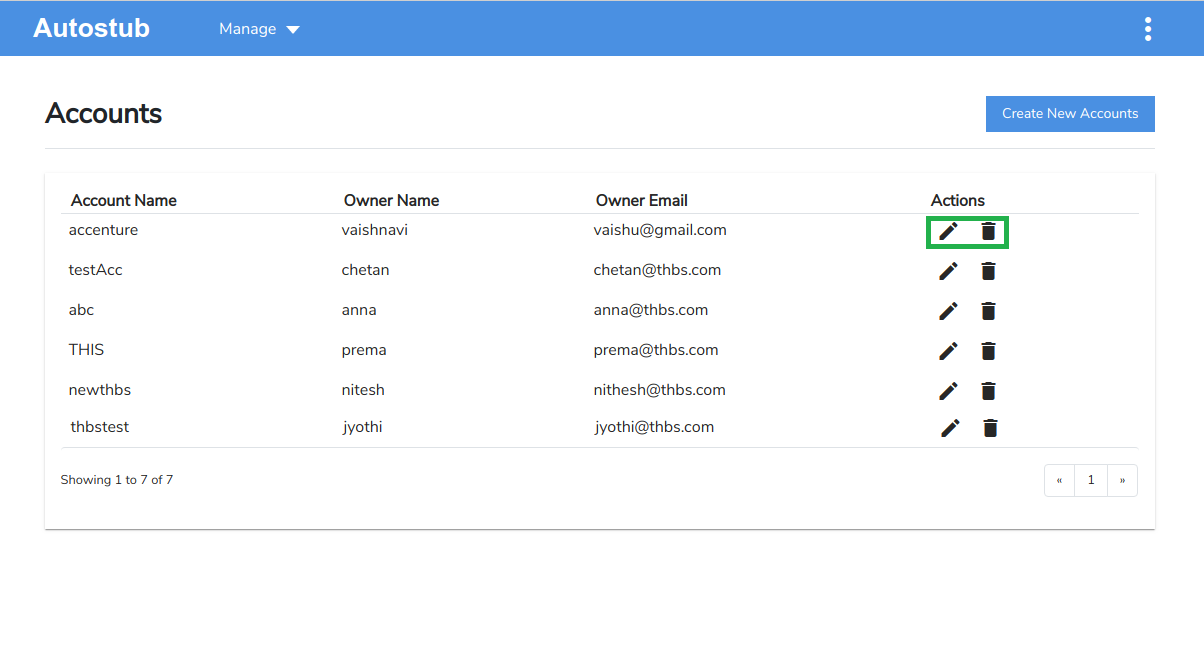
Fig. 3.8 Accounts – Edit/Delete
3.1.2. Update an account
Click the edit icon
corresponding to the account you want to edit. The Update Account page is displayed.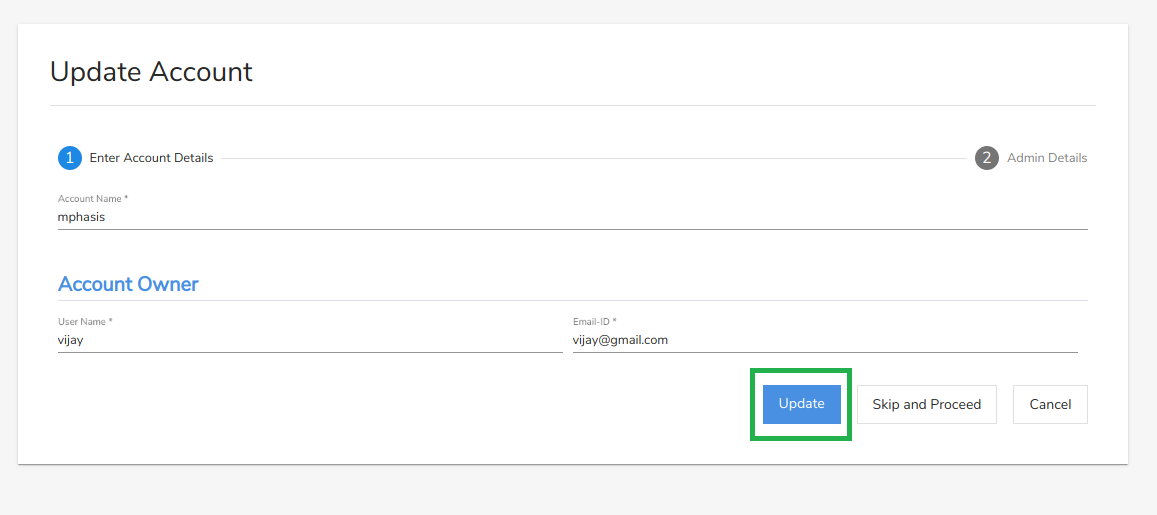
Fig. 3.9 Update Account
Make the necessary modifications to the account and click Update to save the changes. Click Skip and Proceed to navigate to the next tab without making any changes.
3.1.3. Delete an account
Click the delete icon
corresponding to account you want to delete. A confirmation message displays asking you to confirm your action. Click Yes to delete the account.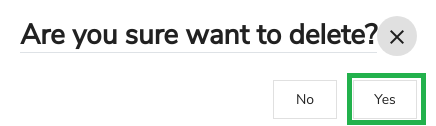
Fig. 3.10 Delete Account
Note
Only Super Admin can create/update/delete accounts.
3.2. Users
3.2.1. Create a user
On the Admin Dashboard, click Manage and then click Users to open the Create User page.
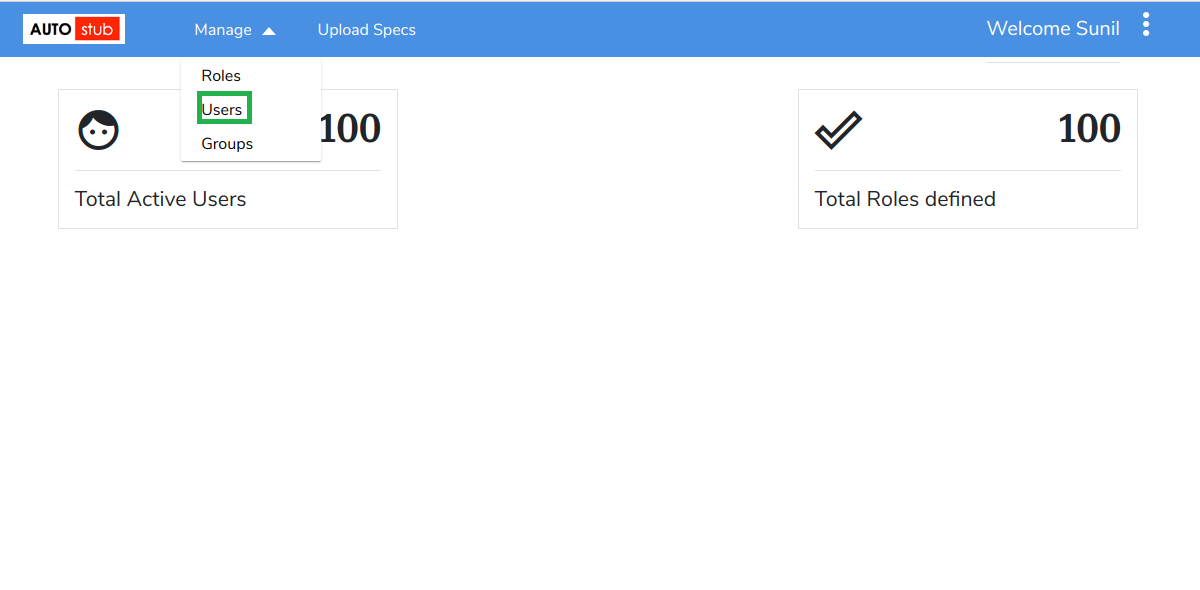
Fig. 3.11 Users
On the Create User page, under the Enter User Details tab, fill the mandatory details such as:
- First Name
- Last Name
- User Name
- Email ID

Fig. 3.12 Create User – Enter User Details
Click Create. The user is created and you are navigated to the Add Application Roles to User tab. Once you create a user, you need to assign an application role to the user. You can either choose to add application roles now or later. The newly created user is added to the list of users on the Users page.
Under the Add Application Roles to User tab, enter Role Name.
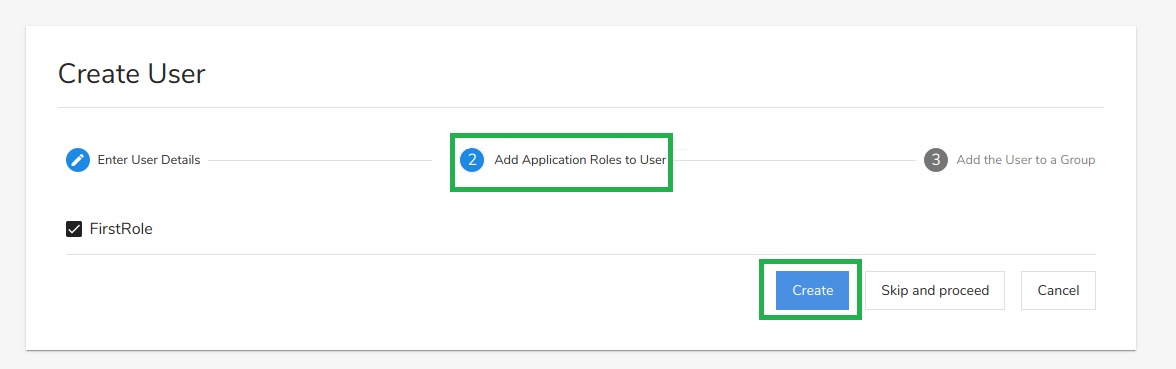
Fig. 3.13 Create User – Add Application Roles to User
Click Create to navigate to the Add the User to a Group page. Click Skip and Proceed to navigate to the Add the User to a Group page without adding application roles.
Note
Roles can be mapped to Users only after they have been created in the Create Role page.
Under the Add the User to a Group tab, enter Group Name.
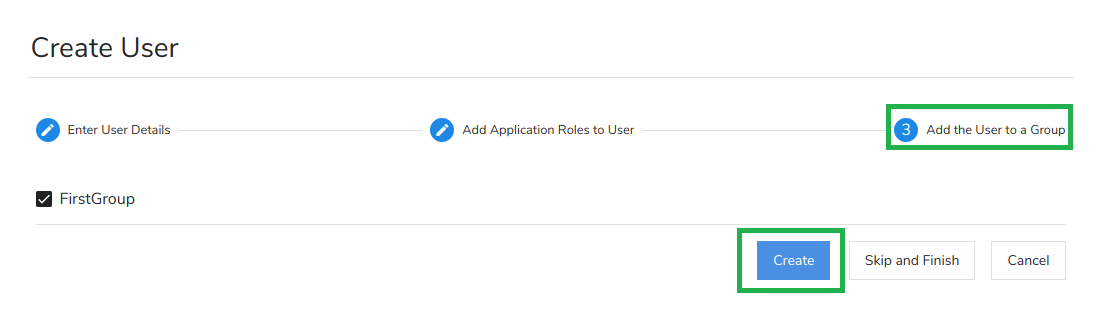
Fig. 3.14 Create User – Add the User to a Group
Click Create to complete the user creation process. Click Skip and Finish to go to Groups page without adding the user to a group.
Note
Users can be added to Groups only after they have been created in the Create Group page.
The Users page displays details such as User Name, E-Mail, Created By, Created Date, Account Name and Actions for each account. As an Admin, you can edit or delete the users created by you using the edit or delete icons respectively.
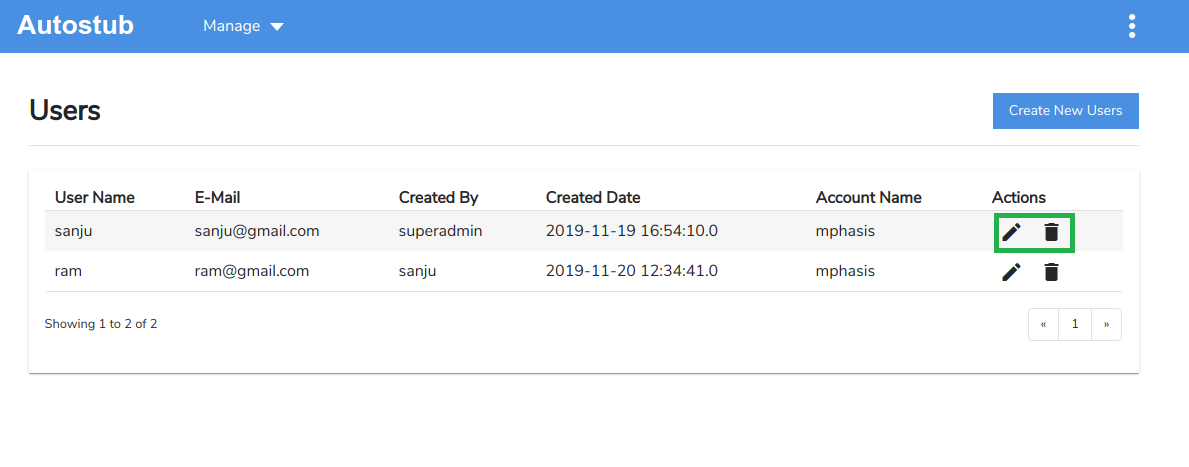
Fig. 3.15 Users – Edit/Delete
3.2.2. Update a user
Click the edit icon
corresponding to the user you want to edit. The Update User page is displayed.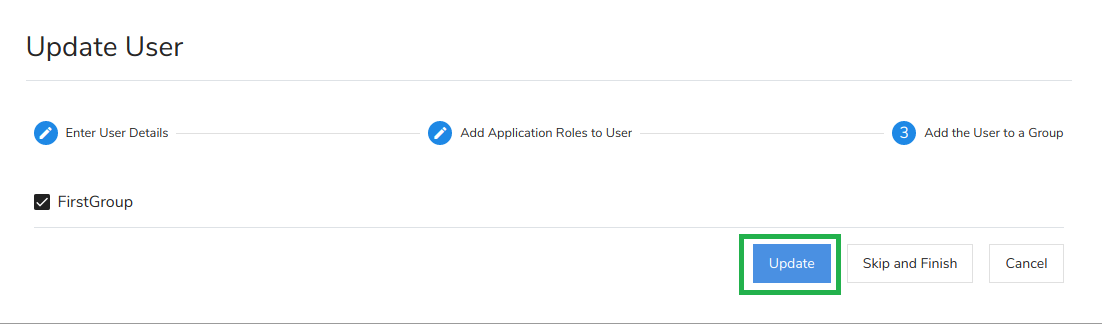
Fig. 3.16 Update User
Make the necessary modifications to the user and click Update to save the changes.
3.2.3. Delete a user
Click the delete icon
corresponding to user you wish to delete. A confirmation message displays asking you to confirm your action. Click Yes to delete the user.
Fig. 3.17 Delete User
Note
Only Admins (or Users with necessary capabilities assigned to them) can create/update/delete users.
3.3. Role
3.3.1. Create a role
Roles are created by Admins for Users.
On the Admin dashboard, click Manage and then click Roles.
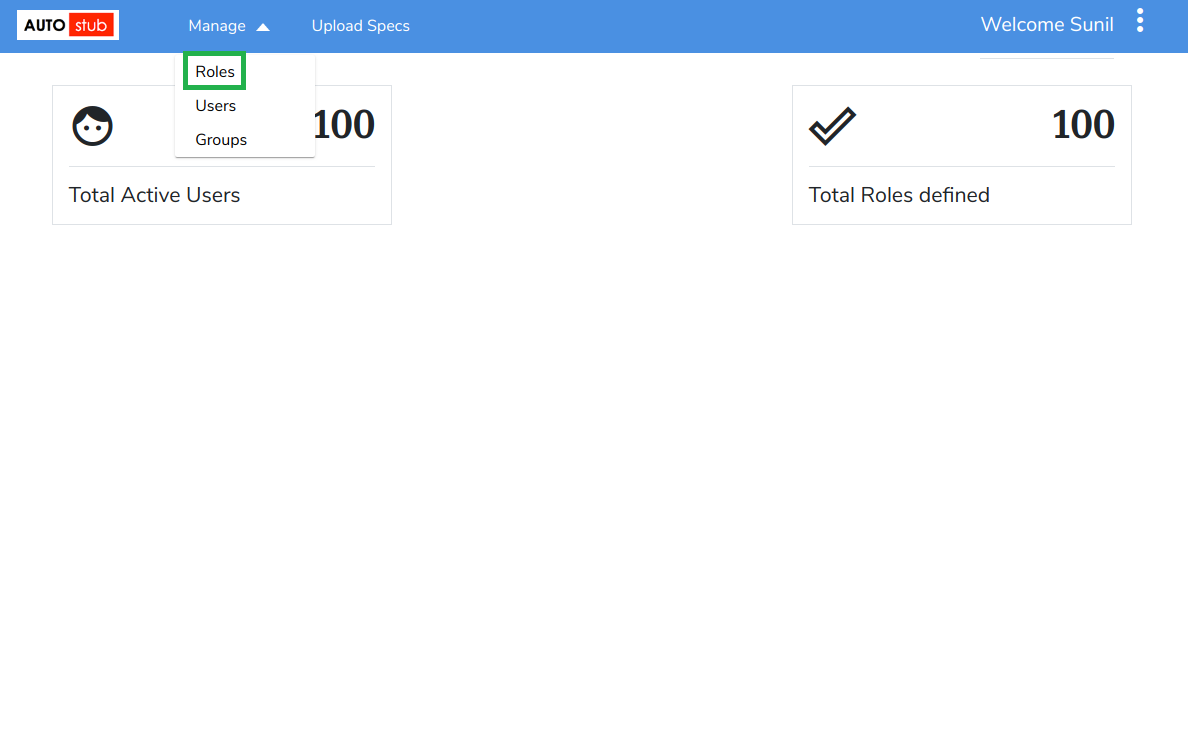
Fig. 3.18 Manage Roles
On the Create Role page, enter the Role Name. Select the capabilities that are to be assigned to the role by selecting the required check box.

Fig. 3.19 Select Capabilities
Click Create Roles. The newly created role is added to the list of roles on the Roles page. Once the roles are created, they can be mapped to the users. The Roles page displays details such as Role Name, Created By, Created Date and Actions for each role. As an Admin, you can edit or delete roles created by you using the edit
or delete icons respectively.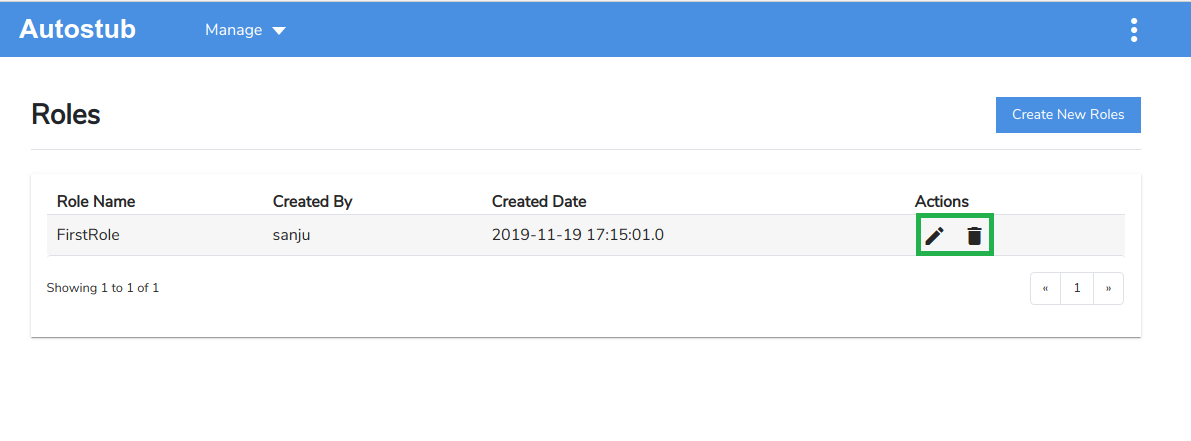
Fig. 3.20 Roles – Edit/Delete
3.3.2. Update a role
Click the edit icon
corresponding to the role you want to edit. The Update Role page is displayed.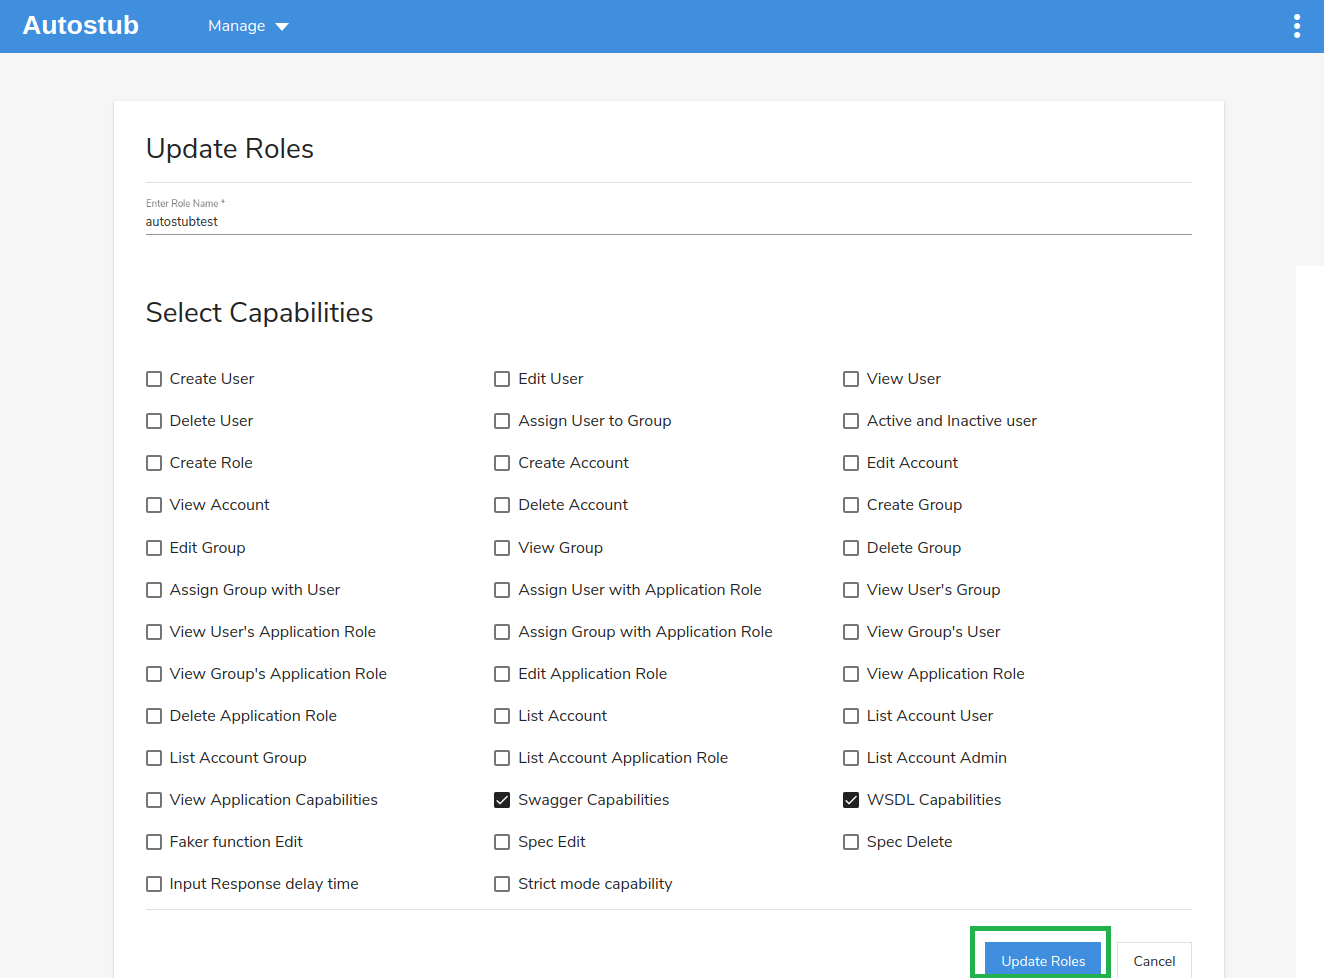
Fig. 3.21 Update Roles
Make the necessary modifications to the role and click Update to save the changes.
3.3.3. Delete a role
Click the delete icon
corresponding to role you wish to delete. A confirmation message displays asking you to confirm your action. Click Yes to delete the role.
Fig. 3.22 Delete Role
Note
Only Admins (or Users with necessary capabilities assigned to them) can create/update/delete roles.
3.4. Groups
Groups are created by Admins for Users.
3.4.1. Create a group
On the Admin Dashboard, click Manage and then click Groups.
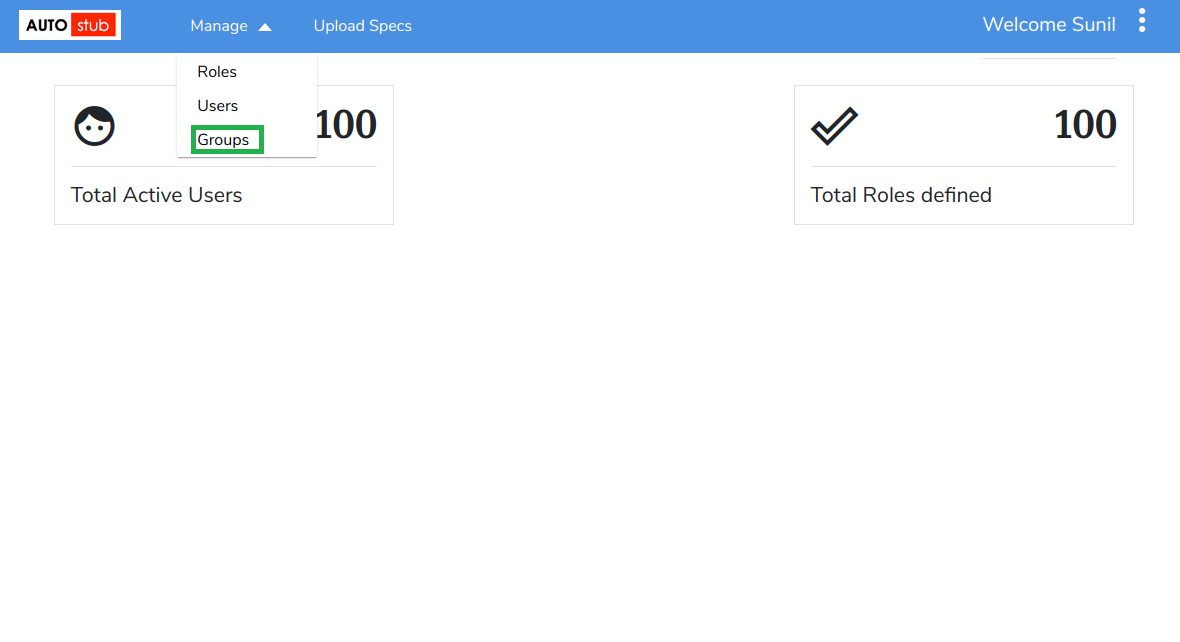
Fig. 3.23 Manage Groups
Enter the Group Name and click Create.

Fig. 3.24 Enter Group Name
The Add Users to Group tab displays List of all Users box on the left and Group Users box on the right. You can add users from the List of all users box to the Group users box using the > button. Use the < button to remove users from the Group users box and add to the List of all users box.
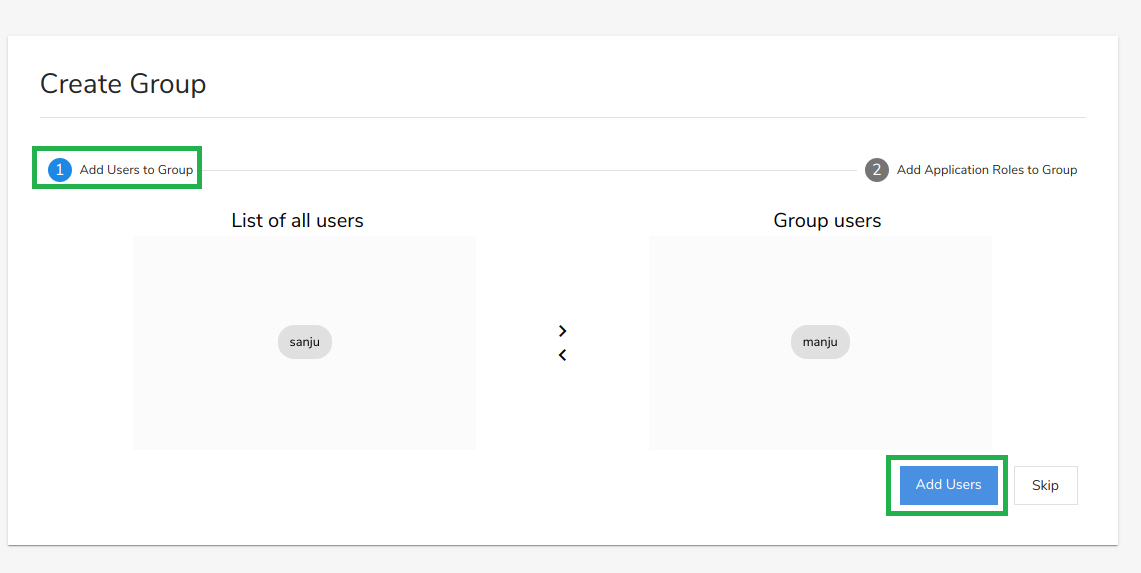
Fig. 3.25 Create Group – Add users to group
Click Add Users to add the users to the group and navigate to the next tab. Click Skip to go to the Application Roles to Group tab without adding users.
Under the Application Roles to Group tab, enter the Role Name and click Add Application Roles. The role is mapped to the group and applicable to all users of that group. Click Skip and Finish to go to the Groups page without adding application roles to the group.
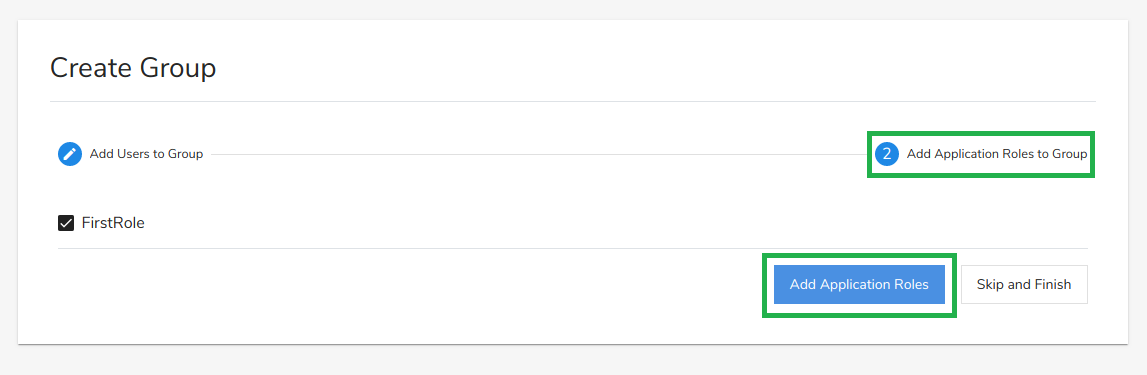
Fig. 3.26 Create Group – Add application roles to group
The newly created group is added to the list of groups on the Groups page. The Groups page displays details such as Group Name, Created By, Created Date, Account Name and Actions for each group. As an Admin, you can edit or delete groups created by you using the edit or delete icons respectively.
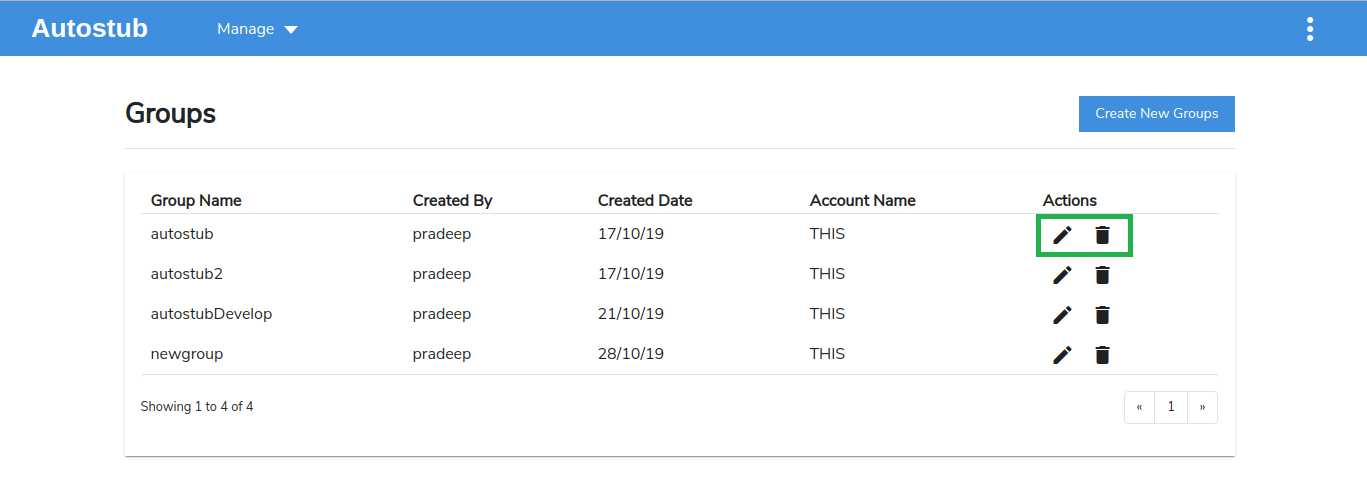
Fig. 3.27 Edit/Delete Groups
3.4.2. Update a group
Click the edit icon
corresponding to the group you want to edit. The Update Group page is displayed.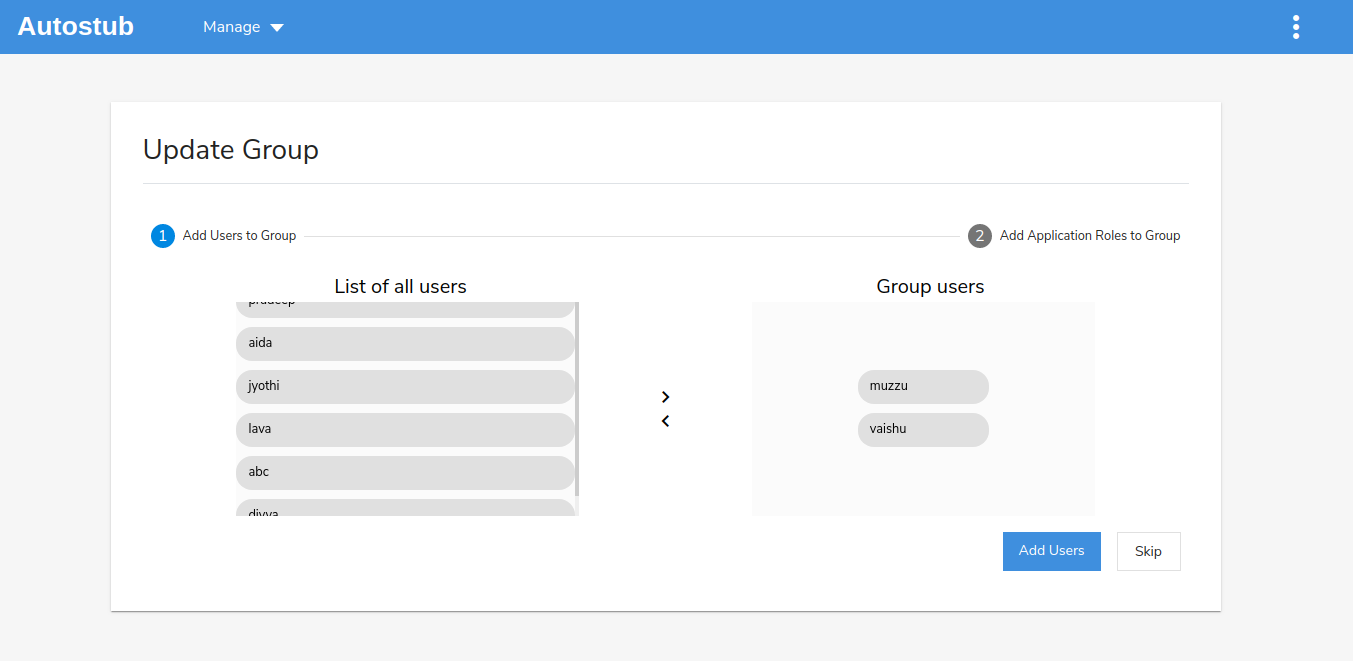
Fig. 3.28 Update Group
Make the necessary modifications to the group and click Add Users to save the changes.
3.4.3. Delete a group
Click the delete icon
corresponding to group you wish to delete. A confirmation message displays asking you to confirm your action. Click Yes to delete the group.
Fig. 3.29 Delete Group
Note
Only Admins (or Users with necessary capabilities assigned to them) can create/update/delete group.